The mission briefing was clear, yet the weight of it settled heavily on the squad. In the grim, zombie-infested landscape of Urzikstan, a lone beacon of hope remained: Dr. Jansen. Their extraction wasn't just another op; it was a potential turning point in the fight against the apocalypse. As of 2026, this high-stakes rescue mission within Call of Duty: Modern Warfare 3's Zombies mode remains a pivotal test of preparation, timing, and sheer survival instinct. The key to success? Knowing that the mission doesn't start at the exfil—it starts the moment you drop.
Locating the Lifeline: The Exfil Beacon
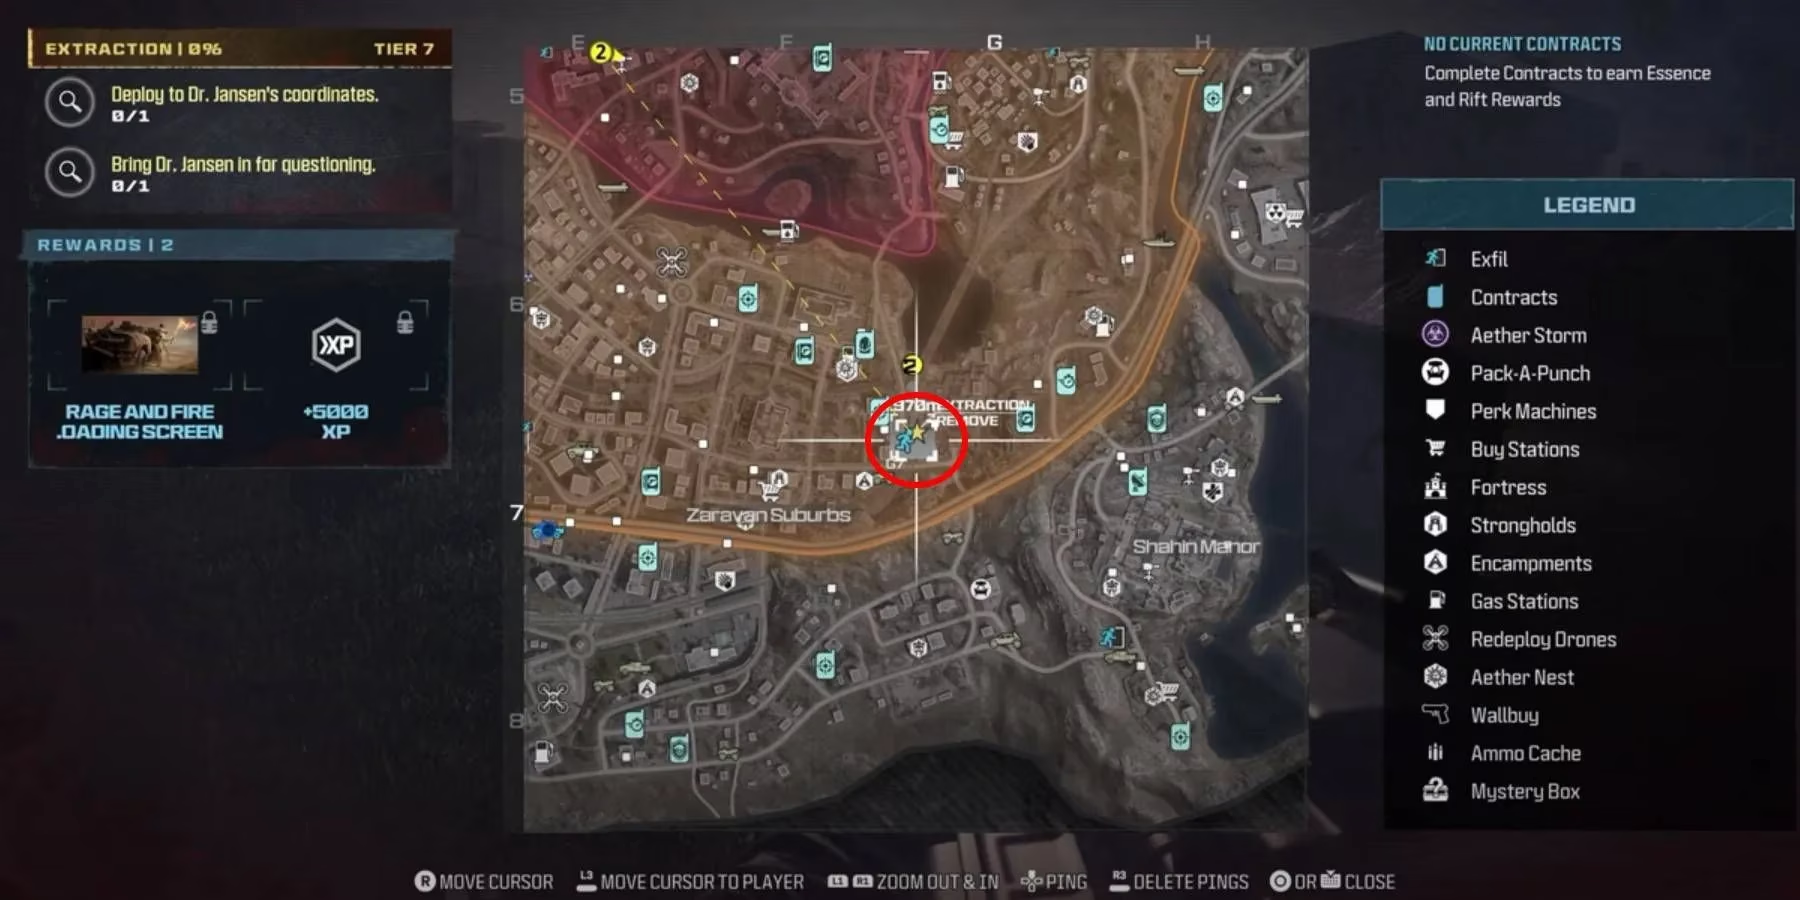
Finding Dr. Jansen is, ironically, the straightforward part. Roughly one minute after your boots hit the ground in Urzikstan, a distinct icon pulses onto your Tac-Map. It's not subtle—a small figure sprinting toward a star, a literal run for your life. This exfil point consistently appears in a specific sector:
-
Primary Landmark: Northwest of the war-torn Shahin Manor.
-
Secondary Reference: Almost directly east of the sprawling Zaravan Suburbs.
Dropping near these areas is a solid play, a real pro-gamer move for those wanting a quick vector to the objective. But veterans know that rushing headlong toward that icon is a one-way ticket to becoming zombie chow. The real mission unfolds in the 45-minute countdown before you're expected to step through that portal.
Gear Up or Give Up: The Essential Prep Phase
You've got a generous 45-minute window from deployment to mandatory exfil. This isn't downtime; it's your golden hour to scavenge, schem, and survive. Remember the cardinal rule: once you enter the exfil zone, the shopping's over. No buy stations, no second chances. You go in with what you've got.
Here’s your essential pre-extraction checklist:
| Priority | Item/Source | Why You Need It |
|---|---|---|
| S-Tier | Jugger-Nog Perk-a-Cola | Maximizes your health pool. Non-negotiable for the chaos ahead. |
| A-Tier | Mystery Box Weapons | High-tier, random firearms. Better than praying for good RNG. |
| A-Tier | Other Perk-a-Colas (Speed Cola, Quick Revive) | Enhanced reload, faster healing. A real game-changer. |
| B-Tier | Armor Plates & Self-Revive Kits | Your basic insurance policy against getting swarmed. |
| C-Tier | Cash & Killstreaks | For last-minute buys and creating breathing room during the exfil. |
Scour the map for those elusive Mystery Boxes. Their random loot could gift you a wonder weapon that turns the tide. And never, ever pass by a Perk-a-Cola machine. That sweet, fizzy Jugger-Nog isn't just a drink; it's the difference between going down in one hit and weathering the storm. Think of it as your get-out-of-jail-free card for the inevitable horde.
The Final Countdown: Executing the Extraction
When your pack is full, your perks are active, and your weapon feels right, it's go time. The journey to the exfil point is often the most dangerous leg. Hordes converge, and the pressure mounts. Stick with your squad, watch each other's six, and use your prepared killstreaks strategically to clear paths or create fallback positions.
Stepping into the exfil zone triggers the final sequence. This is where all that preparation pays off. Defend the position, hold the line against the escalating waves, and secure the portal. Success means more than just XP and mission completion; it means you've pulled a critical asset from the jaws of the undead.
In the end, the search for Dr. Jansen in Modern Warfare 3 Zombies is a masterclass in risk management. It teaches players that in Urzikstan, fortune favors the prepared. You can't just wing it and hope for the best. You need a plan, gear, and the grit to see it through. So load up, squad up, and get that doctor out. The future might just depend on it.