The second mission of Call of Duty: Modern Warfare 3’s campaign throws players directly into a high-stakes scramble at the Urzikstan port. Konni forces are raiding the area, desperate to seize American missiles, and the player, controlling Farah, must ensure that Shadow Company can track those missiles even after they are stolen. The Precious Cargo mission unfolds as an Open Combat Mission, meaning exploration is encouraged and rewarded with a staggering 21 different weapons and items scattered across the map. While grabbing every single armament is entirely optional and often distracts from the primary objective, completionists and tactical-minded operators will want to track down each piece to fully customize their loadout. This guide breaks down the locations of every known weapon and item, complete with tips on how to reach the trickiest spots, as of 2026.
Southern Container Zone
The southern portion of the map is a dense labyrinth of stacked shipping containers, offering multiple floors of loot. Start by looking for the Silenced Expedite 12, a shotgun that delivers stealthy close-quarters devastation. It sits inside a shipping container on the southwest side, elevated high enough that you cannot simply walk in. Players must mantle onto the opposite container and then perform a well-timed jump across the gap to enter the container and claim the weapon. Its suppressed barrel makes it ideal for quietly clearing out Konni patrols without alerting the entire port.
Nearby, in the same southwestern cluster, a lone shipping container houses the Heartbeat Sensor. This tactical equipment is invaluable for tracking enemies through walls, especially in the cluttered office building later in the mission. After grabbing the Expedite 12, simply drop down to the adjacent container to find the sensor resting on a shelf.
Just east of these containers, a large two-story building spans the south-central area between two container terminals. The ground floor of this structure holds the 556 Icarus, a belt-fed light machine gun that chews through ammunition but suppresses enemies with unparalleled ferocity. It lies in plain sight on a crate, making it one of the easiest pickups. In the same room, resting on a nearby table, is the Snapshot Pulse field upgrade. When activated, this device momentarily highlights all enemies within a wide radius, perfect for breaching Konni-held rooms or checking blind corners. To top off the building’s offerings, climb the ladder at the rear to reach the roof and acquire the PILA launcher. The PILA provides a lock-on missile system, essential for downing any helicopters that might pursue you later in the mission. The roof also offers a stunning overwatch position, letting you scout the entire southern sector.
Southeastern Warehouse Office
Moving to the southeast corner of the map reveals a multi-story warehouse office building, a hotspot for heavy weaponry. On the ground floor, tucked behind a reception desk, you will find a Munitions Box – a deployable ammo resupply station. This item is particularly useful if you decide to hold out in this building, as it restocks both primary and secondary ammo, as well as lethal and tactical equipment. It’s a simple grab that can turn a defensive stand into a prolonged slaughter.
The building’s third floor is where things get interesting. Two powerful LMGs await in separate offices. First, the RPK, a classic drum-fed machine gun, sits on a desk in a central office. Its 75-round magazine and manageable recoil make it a reliable workhorse for sustained firefights. Second, and more challenging to locate, the Pulemyot 762 rests in the far left office on the same floor. This high-caliber LMG hits like a truck but kicks accordingly, rewarding players who control its burst fire. To reach this wing, you may need to mantle through a broken window or use the interior stairs – watch out for Konni soldiers patrolling the hallways.
Also on the third floor, you will stumble upon a Parachute and an Ascender. While not weapons themselves, these tools are game-changers for navigation and are vital for accessing the final hidden prize. The Parachute lets you safely leap from high perches without taking fall damage, and the Ascender clips onto vertical ziplines, launching you upward at speed. Keep both in your inventory before heading outside.
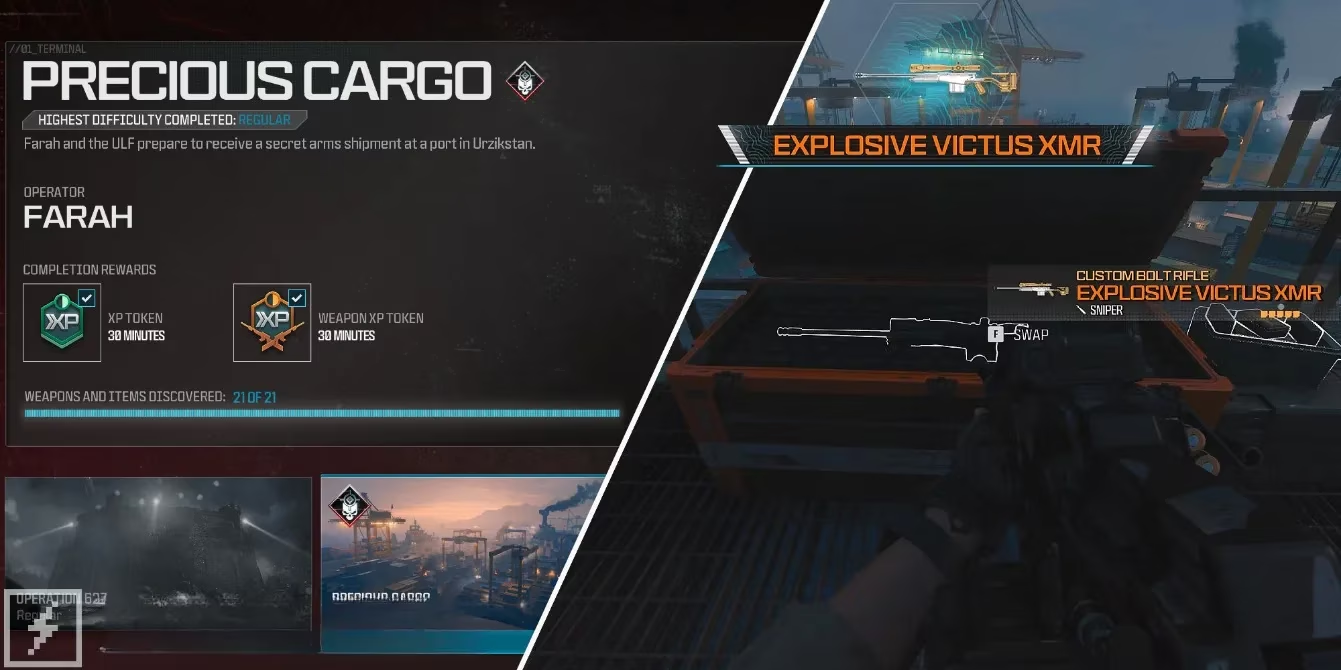
The roof of this same warehouse office harbors the elusive Explosive Victus, a powerful sniper rifle with high-explosive rounds. To get onto the roof, you cannot simply scale the interior. Instead, circle to the rear of the building where a vertical zipline hangs from the roof edge. Equip your Ascender, attach it to the zipline, and ascend swiftly. Once on top, the Victus lies near the edge, overlooking the port. This weapon can one-shot most infantry and deals area-of-effect damage, making it a top-tier pickup for the final exfiltration.
Western Shoreside Containers
The west side of the map, closer to the water’s edge, features a lone shipping container that somehow manages to pack two outstanding firearms in one small space. Inside this container, leaning side by side against the metal wall, are the MTZ-556 assault rifle and the Silenced WSP Swarm submachine gun. The MTZ-556 offers excellent accuracy and a clean iron sight, while the Silenced WSP Swarm shreds enemies at close range without giving away your position with muzzle flash. Because this container is isolated and easily missed, many players only discover it after clearing the main objectives – but savvy operators will prioritize a detour here early on.
Other Noteworthy Pickups
While the above items represent the handpicked highlights, the mission contains many more weapons and field upgrades beyond this list. The full count stands at 21 unique acquisitions, including pistols, additional SMGs, and alternative tactical gear. Some of these can be scavenged from fallen enemies, while others hide in less conspicuous corners such as inside small offices, on balcony ledges, or beneath staircases. Reckless explores may also uncover a Snapshot Pulse on a mid-level walkway or a second Heartbeat Sensor stashed in a security booth. The key to finding everything is to thoroughly comb every building, container stack, and rooftop before triggering the extraction sequence.
Quick Reference Table
For busy operators, here is a condensed version of the most sought-after weapons and where to grab them:
| Item | Location | Notes |
|---|---|---|
| Silenced Expedite 12 | SW container, high stack | Mantle and jump to reach |
| Heartbeat Sensor | SW lone container, near Expedite 12 | Easy grab |
| 556 Icarus | South-side building ground floor | Spurred crate |
| Snapshot Pulse | Same room as 556 Icarus | Table pickup |
| PILA | Roof of south-side building | Use ladder at rear |
| Munitions Box | Bottom floor, SE warehouse office | Behind desk |
| RPK | Third floor, central office, SE warehouse | Desk |
| Pulemyot 762 | Third floor, far left office, SE warehouse | Through broken window/stairs |
| Parachute & Ascender | Third floor, SE warehouse (near Pulemyot) | Essential for mobility |
| Explosive Victus | Roof of SE warehouse office | Ascend via rear zipline |
| MTZ-556 & Silenced WSP Swarm | Lone container on west side | Two weapons in one spot |
Final Pre-Mission Tips
Approach the Precious Cargo mission not as a linear sprint, but as a sandbox begging to be scoured. Prioritize picking up the Ascender and Parachute early – they unlock vertical shortcuts that save valuable time. The Heartbeat Sensor and Snapshot Pulse synergize perfectly for room clearing, while the PILA turns deadly helicopters into scrap metal. Each weapon and item you collect enhances your tactical options, and the Open Combat Mission structure means you can replay with entirely different loadouts. Whether you are a longtime CoD veteran revisiting the campaign in 2026 or a newcomer diving into Modern Warfare 3 for the first time, mastering the armory of Precious Cargo will sharpen your edge in the fight against Konni.